Back to Blogs
A Step-by-Step Guide on How to Insulate a Chimney with a Chimney Insulation Kit
November 6, 2023

Ensuring that your home is energy-efficient is not just about sealing windows and doors; it’s also crucial to address other potential sources of heat loss, such as your chimney. Insulating your chimney can significantly improve energy efficiency and reduce heating costs. In this guide, we’ll walk you through the process of insulating your chimney using a chimney insulation kit.
Materials Needed
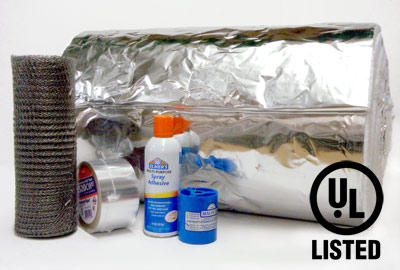
- Chimney insulation kit
- Wire brush
- Chimney sealant
- Measuring tape
- Utility knife
- Safety goggles
- Work gloves
Step 1: Measure Your Chimney:
Before you start, measure the dimensions of your chimney to determine the amount of insulation needed. Take accurate measurements of the width, height, and depth of the chimney, and purchase a chimney insulation kit that matches these dimensions.
Step 2: Clean the Chimney Surface:
Using a wire brush, clean the surface of the chimney to remove any debris, soot, or creosote buildup. This step ensures better adhesion of the insulation material to the chimney walls.
Step 3: Prepare the Chimney Insulation Kit:
Carefully unpack the chimney insulation kit and read the manufacturer’s instructions. Most kits include insulation panels or wraps designed to fit around the chimney. Ensure that you have all the necessary components before proceeding.
Step 4: Apply Chimney Sealant:
If your kit includes chimney sealant, apply it to the cleaned chimney surface. The sealant helps create a secure bond between the insulation and the chimney, preventing any air gaps.
Step 5: Install Insulation Panels or Wrap:
Follow the manufacturer’s instructions to install the insulation panels or wrap around the chimney. Typically, you’ll need to secure the insulation in place using the provided fasteners. Ensure a snug fit and wrap the insulation tightly to prevent heat from escaping.
Step 6: Cut Excess Insulation:
Using a utility knife, trim any excess insulation material, ensuring a neat and clean finish. Be cautious while cutting, and wear safety goggles and gloves for protection.
Step 7: Secure the Insulation:
Double-check that the insulation is securely fastened to the chimney. Make any necessary adjustments to ensure a tight and uniform fit.
Step 8: Inspect and Maintain:
After installation, inspect the chimney regularly to ensure that the insulation remains intact and effective. If you notice any damage or wear, promptly address it to maintain the insulation’s efficiency.
Conclusion:
Insulating your chimney with a chimney insulation kit is a practical and effective way to enhance your home’s energy efficiency. By following these step-by-step instructions, you can create a barrier that prevents heat loss through the chimney, ultimately saving energy and reducing heating costs.
