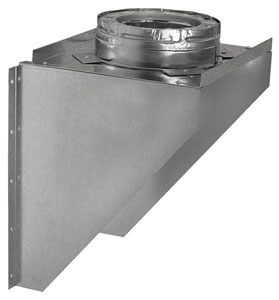
Installing a chimney tee support is a critical step in ensuring the stability and safety of your chimney system. Whether you’re embarking on a new installation or upgrading your existing setup, this guide is designed to walk you through the process of installing a chimney tee support with precision and confidence.
Understanding the Chimney Tee Support
A chimney tee support is a crucial component that provides structural support at the point where the chimney pipe transitions from a vertical orientation to a horizontal one. Proper installation is paramount to prevent issues such as sagging or misalignment, which could compromise the efficiency and safety of your chimney system.
Materials You’ll Need
Chimney Tee Support Kit: Acquire a high-quality tee support kit that suits the specific requirements of your chimney system. Ensure it includes all necessary components for a seamless installation.
Level: A level is essential for ensuring that the chimney tee support is installed in a perfectly vertical position.
Screws and Anchors: Depending on your chimney’s construction, you may need screws and anchors to secure the tee support in place.
Power Drill: A power drill will expedite the installation process, making it easier to secure the tee support firmly.
Measuring Tape: Accurate measurements are crucial for proper alignment and spacing during installation.
Step-by-Step Guide:
Locate the Installation Point
Identify the ideal location for installing the chimney tee support. This is typically where the chimney pipe transitions from vertical to horizontal.
Prepare the Area
Ensure the area is clear of any obstructions. Clean the surface where the tee support will be installed to promote a secure connection.
Attach the Tee Support Bracket
Securely attach the tee support bracket to the designated point on the chimney. Use the screws and anchors provided in the kit or as recommended by the manufacturer.
Leveling the Tee Support
Use a level to ensure that the tee support is perfectly vertical. This step is crucial for preventing alignment issues that may affect the overall stability of the chimney system.
Install the Tee
Assemble and attach the tee to the support bracket, ensuring a snug fit. Follow the manufacturer’s instructions for connecting the tee securely.
Secure Additional Sections
If your chimney system requires additional sections, secure them following the manufacturer’s guidelines. Ensure that each component is tightly connected.
Check for Stability
Once the installation is complete, check for any signs of instability or misalignment. Make any necessary adjustments to guarantee a secure and stable chimney tee support.
A well-installed chimney tee support is instrumental in maintaining the structural integrity of your chimney system. By following this step-by-step guide and adhering to the manufacturer’s instructions, you can ensure a successful installation that contributes to the safety and efficiency of your chimney.
