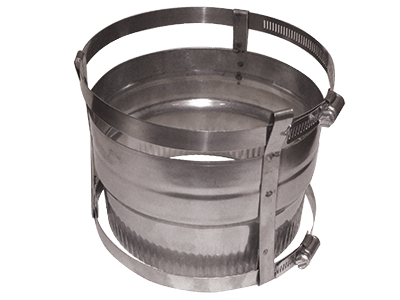
Installing a flex liner coupler is a crucial step in enhancing the flexibility and efficiency of your chimney system. Whether you’re upgrading your existing system or embarking on a new installation, this guide provides a detailed step-by-step walkthrough to ensure a seamless connection using a flex liner coupler.
Understanding the Flex Liner Coupler
A flex liner coupler is designed to connect two sections of flexible chimney liner, facilitating a secure and flexible joint. This component is essential for maintaining a smooth and airtight connection, ensuring optimal venting of gases from your fireplace or wood-burning appliance.
Materials You’ll Need
Flex Liner Coupler: Choose a high-quality flex liner coupler that matches the dimensions and specifications of your flexible chimney liner.
Screws: Ensure you have screws provided with the coupler or choose appropriate screws for a secure connection.
Power Drill: A power drill will expedite the installation process, making it easier to secure the flex liner coupler firmly.
Protective Gear: Wear gloves and safety goggles to protect yourself during the installation process.
Measuring Tape: Accurate measurements are crucial for ensuring proper alignment and a secure fit.
Step-by-Step Guide:
Inspect the Flexible Liner Ends
Before installing the flex liner coupler, inspect the ends of the flexible chimney liner for any damage or irregularities. Trim if necessary to ensure clean and even ends.
Prepare the Coupler
Unpack the flex liner coupler and familiarize yourself with the components. Ensure that all necessary materials, including screws, are present.
Position the Coupler
Position the flex liner coupler between the two ends of the flexible chimney liner, ensuring that it sits snugly and aligns with both liners.
Secure with Screws
Use the screws provided with the coupler or appropriate screws to secure the coupler in place. Insert the screws through the designated holes in the coupler and tighten them with a power drill.
Repeat for the Other End
If your installation involves multiple flex liner couplers, repeat the process for each connection. Ensure consistent alignment and a secure fit for each coupler.
Inspect the Connection
Once all flex liner couplers are installed, inspect the connections for any signs of looseness or misalignment. Make any necessary adjustments to ensure a secure and airtight fit.
Test for Flexibility
Confirm that the flexible chimney liner maintains its flexibility at the coupler joints. Ensure there are no restrictions in movement that could hinder the overall flexibility of the liner.
Installing a flex liner coupler is a crucial aspect of creating a flexible and efficient chimney system. By following this step-by-step guide and adhering to the manufacturer’s instructions, you can ensure a secure and airtight connection for optimal venting of gases from your fireplace or wood-burning appliance.
