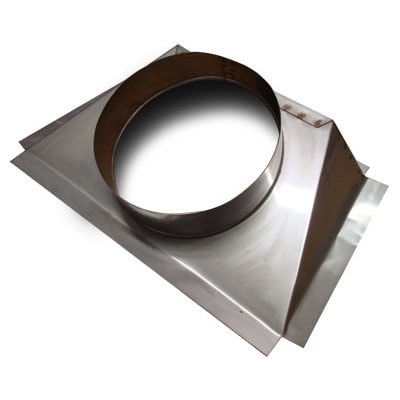
Installing a chimney liner insert boot is a crucial step in enhancing the efficiency and safety of your chimney system. This guide will take you through a detailed, step-by-step process to ensure a successful installation. Follow these instructions carefully to achieve a secure and reliable chimney liner insert boot installation.
Step 1: Gather Materials and Tools
Before starting the installation, gather all the necessary materials and tools:
- Chimney liner insert boot
- Sealant/adhesive recommended for high-temperature applications
- Screwdriver or drill
- Stainless steel screws
- Tape measure
- Safety gloves and goggles
Step 2: Measure and Prep the Chimney Liner
Begin by measuring the diameter of your chimney liner. Ensure the chimney liner insert boot matches the liner’s size for a snug fit.
Clean the surface around the area where the boot will be installed. Remove any debris, soot, or existing sealant to ensure a clean and secure bond.
Step 3: Apply Sealant to the Boot
Apply a generous amount of high-temperature sealant to the base of the chimney liner insert boot. This sealant will create a strong and durable bond between the boot and the chimney liner.
Step 4: Position the Boot on the Liner
Carefully slide the chimney liner insert boot onto the chimney liner. Ensure the boot is positioned correctly, covering the top opening of the chimney and providing a secure connection.
Step 5: Secure the Boot in Place
Once the boot is in position, use stainless steel screws to secure it firmly. Space the screws evenly around the base of the boot to ensure a tight and stable attachment.
Step 6: Seal the Joints
Apply additional sealant around the joints where the boot connects with the chimney liner. This extra layer of sealant enhances the waterproofing and durability of the installation.
Step 7: Allow for Proper Cure Time
Follow the manufacturer’s recommendations for cure time. It is essential to allow the sealant to cure completely before subjecting the chimney to heat or weather conditions.
Step 8: Perform a Final Inspection
Conduct a thorough inspection of the chimney liner insert boot installation. Ensure all screws are tight, and the sealant has cured properly. Look for any gaps or areas that may need additional sealant.
Step 9: Test the System
Once the installation is complete and the sealant has cured, test the chimney system. Run a controlled fire to ensure proper ventilation and assess the overall functionality of the chimney liner insert boot.
Following these step-by-step instructions will help you achieve a successful chimney liner insert boot installation. Remember to prioritize safety and carefully adhere to the manufacturer’s recommendations for materials and cure times. If you encounter any challenges during the installation process, consult with a professional chimney technician for assistance. A well-installed chimney liner insert boot contributes to the overall efficiency and safety of your chimney system, providing peace of mind for years to come.
