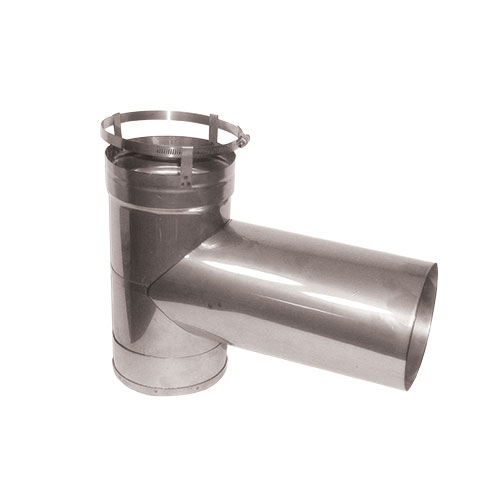
Installing a chimney flex liner tee is a crucial step in enhancing the performance and safety of your chimney system. This comprehensive guide will take you through the step-by-step process to ensure a successful installation. Follow these instructions meticulously for a secure and reliable chimney flex liner tee installation.
1. Gather Materials and Tools:
- Chimney Flex Liner Tee Kit: Ensure it includes all necessary components.
- Screwdriver or Drill: For securing connections.
- Tape Measure: Precise measurements are key.
- High-Temperature Sealant: To create secure seals.
- Safety Gloves and Goggles: Ensure proper protection during installation.
2. Measure and Prep the Chimney Flex Liner:
- Measure the diameter of the chimney flex liner.
- Clean the liner thoroughly to remove any debris or contaminants.
3. Assemble the Flex Liner Tee:
- Connect the tee sections, ensuring a secure fit.
- Apply high-temperature sealant to the joints to create airtight seals.
4. Insert the Flex Liner Tee into the Chimney:
- Carefully insert the assembled flex liner tee into the chimney.
- Ensure proper alignment and positioning within the chimney structure.
5. Secure Connections:
- Use a screwdriver or drill to secure connections, providing stability to the flex liner tee assembly.
- Ensure all screws are tightened securely but avoid over-tightening to prevent damage.
6. Seal Joints with High-Temperature Sealant:
- Apply an additional layer of high-temperature sealant around the joints to enhance the airtight seals.
- Inspect for any gaps and seal them thoroughly.
7. Check for Proper Alignment:
- Verify that the flex liner tee is correctly aligned within the chimney.
- Ensure it does not obstruct the airflow and maintains a smooth path for gases to exit.
8. Perform a Draft Test:
- Conduct a draft test to ensure proper airflow through the flex liner tee.
- Address any issues or adjustments needed based on the draft test results.
9. Secure Top Connection:
- If the flex liner tee extends above the chimney, secure the top connection with screws.
- Apply sealant around the top connection to prevent water or debris infiltration.
10. Allow for Cure Time:
- Follow the manufacturer’s recommendations for cure time of the high-temperature sealant.
- Avoid subjecting the chimney system to heat until the sealant has cured completely.
11. Conduct a Final Inspection:
- Perform a thorough inspection of the entire flex liner tee installation.
- Ensure all connections are secure, seals are intact, and the tee is positioned correctly.
12. Test the Chimney System:
- Run a controlled fire in the fireplace to test the performance of the chimney system with the newly installed flex liner tee.
- Monitor for any signs of issues and address them promptly.
Conclusion:
By following this chimney flex liner tee installation guide, you can ensure a successful and reliable installation that enhances the efficiency and safety of your chimney system. If you encounter any challenges during the process, don’t hesitate to seek professional assistance to guarantee optimal performance.
At Chimney Liner Depot, they take pride in our Flex Liner Tee, a product they manufacture in their own factory. By controlling the production process, they ensure the highest quality and reliability for their customers. Choose Chimney Liner Depot for top-notch products directly from the source.
Spring Hill Chimney Service is your expert partner for chimney tee installation and a wide range of comprehensive chimney services. Contact us now to ensure your chimney system is in top-notch condition with our professional and reliable offerings.
Subscribe
Login
0 Comments
Copyright © 2026. Springhill Chimney. All Rights Reserved.
