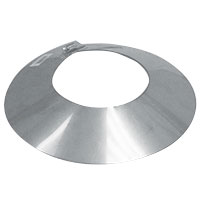
Storm collars play a crucial role in protecting your chimney system from water infiltration and ensuring a watertight seal around the chimney pipe. Proper installation is key to their effectiveness. In this step-by-step guide, we’ll walk you through the process of installing storm collars to safeguard your chimney against the elements.
1. Gather Necessary Tools and Materials:
Before starting the installation, make sure you have the following tools and materials:
- Storm Collar
- Screwdriver or Drill
- Stainless Steel Screws
- Silicone Sealant
- Measuring Tape
2. Choose the Right Size Collar:
Ensure you have the correct size storm collar that matches the diameter of your chimney pipe. Using an ill-fitting collar may compromise the effectiveness of the seal.
3. Measure and Mark the Installation Point:
Measure the height of the chimney pipe extending above the roofline. Mark this point as the location for installing the storm collar. Ensure the collar will cover the gap between the pipe and the flashing.
4. Apply Silicone Sealant:
Apply a generous amount of silicone sealant around the chimney pipe at the marked installation point. This creates a waterproof seal and enhances the collar’s effectiveness.
5. Slide the Storm Collar into Place:
Slide the storm collar down the chimney pipe until it rests on the silicone-sealed area. Ensure it covers the gap between the pipe and the flashing, creating a protective barrier against water penetration.
6. Secure the Storm Collar:
Using a screwdriver or drill, secure the storm collar in place by attaching it to the chimney pipe. Use stainless steel screws to prevent corrosion and ensure a durable connection.
7. Inspect the Seal:
Visually inspect the seal between the storm collar and the chimney pipe. Ensure there are no gaps or spaces that could allow water to penetrate. Apply additional silicone sealant if needed.
8. Check for Tightness:
Confirm that the storm collar is securely tightened around the chimney pipe. This prevents it from shifting or loosening over time, maintaining a reliable barrier against water and weather elements.
9. Conduct a Water Test:
After installation, simulate rainfall or use a hose to conduct a water test. Observe the storm collar’s performance, ensuring that it effectively diverts water away from the chimney pipe and flashing.
10. Monitor and Maintain:
Regularly monitor the storm collar for any signs of wear or damage. Perform maintenance as needed, such as reapplying silicone sealant or tightening screws, to ensure continued protection.
Conclusion:
By following these step-by-step instructions for storm collar installation, you can enhance the waterproofing capabilities of your chimney system. Properly sealed storm collars contribute to the overall longevity and performance of your chimney, protecting it from the challenges posed by rain, snow, and other weather conditions.
