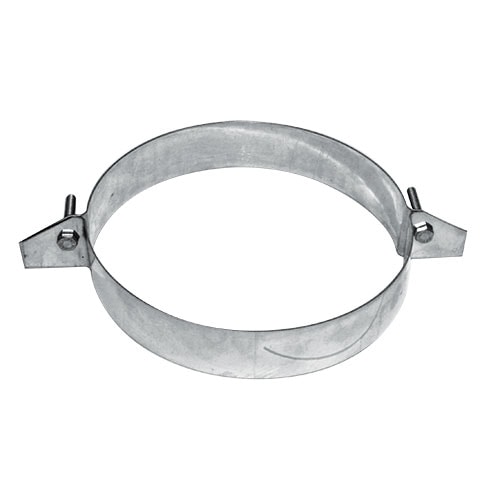
Installing a rigid support clamp is a critical step in ensuring the stability and safety of your chimney system. This step-by-step guide will walk you through the process, ensuring a secure and reliable installation for optimal performance.
1. Gather Necessary Tools and Materials:
Before you begin the installation, gather the tools and materials required:
- Rigid Support Clamp Kit
- Screwdriver or Drill
- Stainless Steel Screws
- Measuring Tape
- Level
2. Choose the Right Size Clamp:
Select a rigid support clamp that matches the diameter of your chimney pipe. Choosing the correct size ensures a snug fit, providing optimal support and stability.
3. Measure and Mark the Installation Point:
Measure the height of the chimney pipe extending above the roofline. Mark this point as the location for installing the rigid support clamp. Ensure the clamp will be positioned securely above the roof penetration.
4. Align the Clamp:
Hold the rigid support clamp against the chimney pipe, aligning it with the marked installation point. Ensure the clamp is level to maintain a straight and stable support structure.
5. Attach the Clamp to the Chimney:
Using a screwdriver or drill, secure the rigid support clamp to the chimney pipe. Insert stainless steel screws through the pre-drilled holes in the clamp, ensuring a firm connection. Tighten the screws securely but avoid over-tightening to prevent damage.
6. Check for Levelness:
Verify that the rigid support clamp is level and securely attached to the chimney pipe. Adjust the positioning if needed to ensure proper alignment.
7. Secure the Base Support:
If the rigid support clamp includes a base support, secure it to the roof surface using appropriate screws. Ensure a stable connection between the clamp and the roof for added support.
8. Inspect the Installation:
Conduct a visual inspection of the rigid support clamp installation. Ensure there are no gaps, and the clamp is securely attached to both the chimney pipe and the roof surface. Confirm that the chimney pipe is well-supported and stable.
9. Perform a Stability Test:
Gently apply pressure to the chimney pipe to simulate external forces, ensuring the rigid support clamp provides stable support. Address any concerns or adjustments needed to enhance stability.
10. Final Check and Maintenance:
Perform a final check of the entire installation. Monitor the rigid support clamp over time and conduct regular maintenance to ensure continued stability and support for your chimney system.
Conclusion:
By following this step-by-step guide on rigid support clamp installation, you can ensure a secure and stable chimney system. Properly installed support clamps contribute to the overall safety and longevity of your chimney, providing the necessary support for the extended portion above the roofline.
